
It's no secret that I have been patiently waiting for baby #3 to arrive.
I have been getting these crazy strong desires to make something. Anything.
It probably doesn't help that I am not sleeping as well anymore either...I will just lay in bed and my mind will race with all of the things I want to do and how I want them to turn out.
When I had my second son I had seen a picture for one of these 'arm cushions' and I always told myself I was going to make one, especially because my second child was a freaking chunk, and that car seat got heavy!
My poor forearms and the inside crease of my elbows went through quite a lot carrying that little guy around in his car seat.
Unfortunately, I never got around to making the arm cushion.
You would think that would be more of a priority...
Since I've been in the crafty mode I decided to whip one up for baby #3 instead!

Since I was only going off of a picture there was some trial and error in the making process, but I am loving the way this turned out!
I know there are other tutorials for these arm cushions, and you can even buy these already made, but I just wanted to share with you what I came up with, and how I got it done.
I've got step-by-step instructions and pictures for you, so let's check it out.
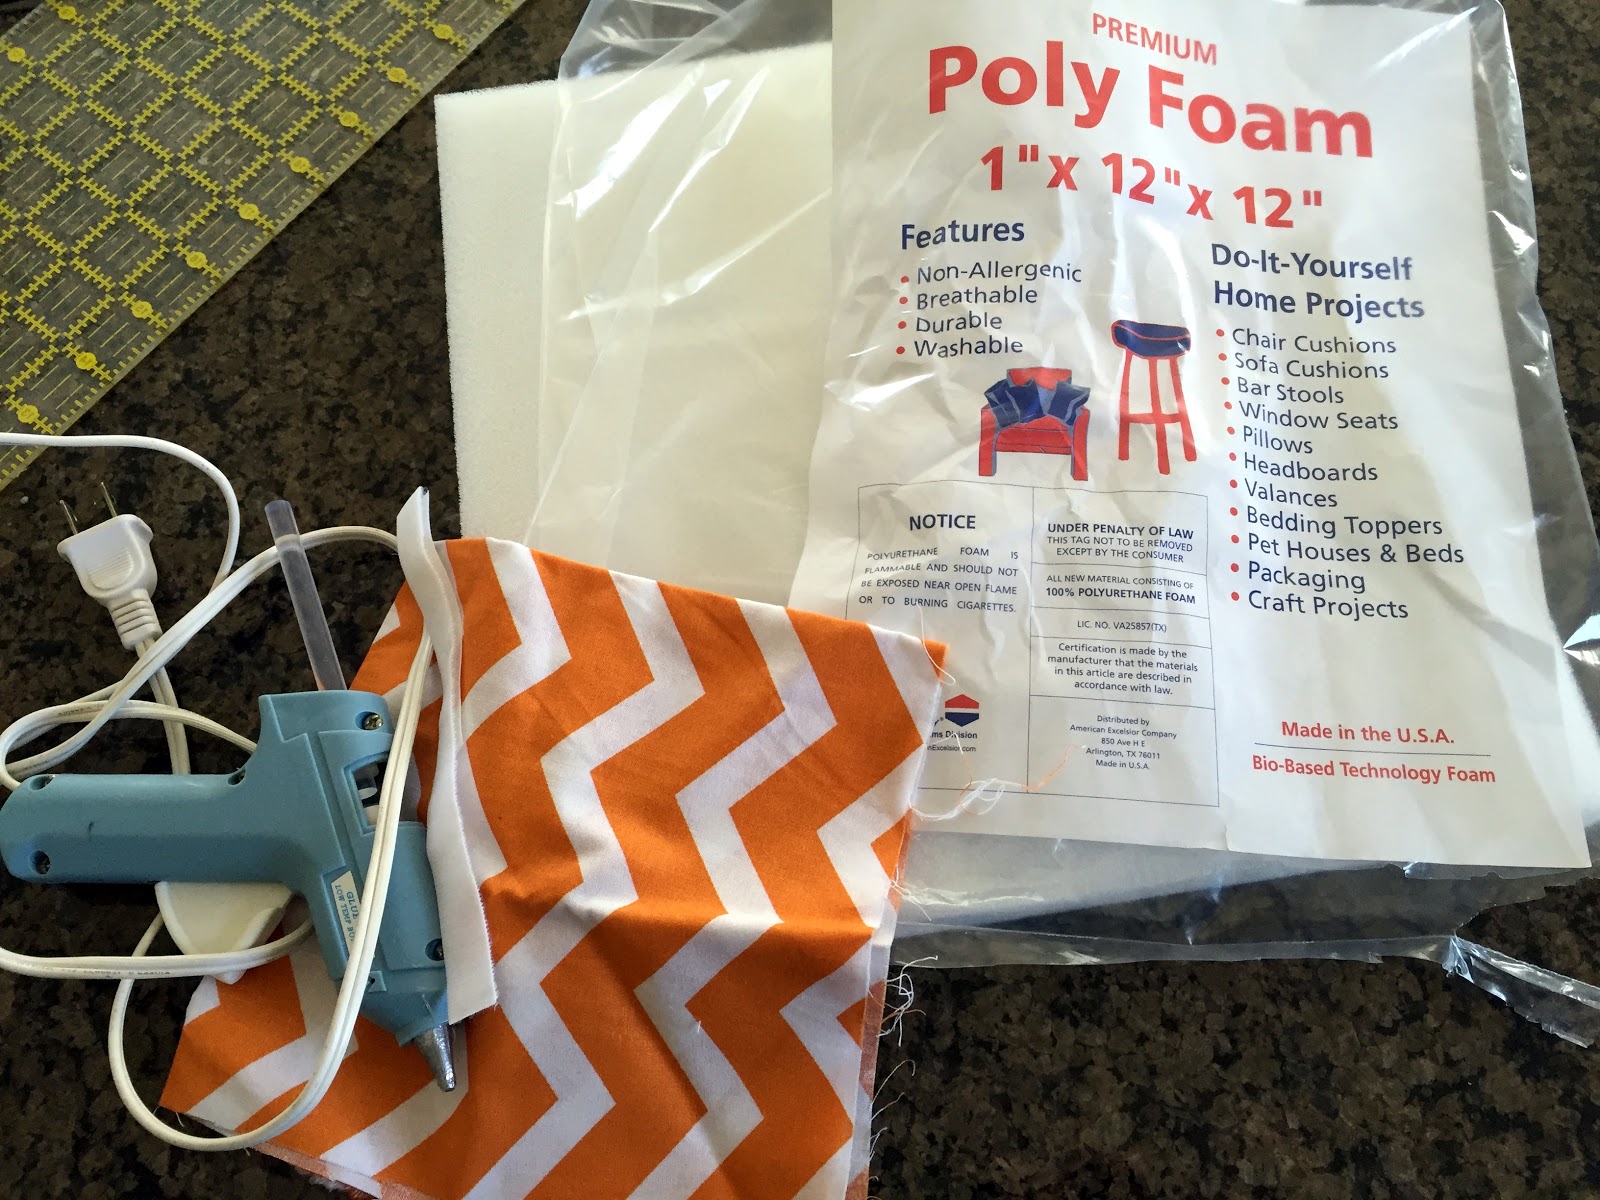
Not everything is pictured, but I started out with:
Glue gun
scissors
riboon
a square of Poly Foam I got from Hobby Lobby for $1.99
a 14" x 14" piece of orange and white chevron fabric that I had leftover from when I made my son curtains last year
velcro
I started out by getting a rough idea of how long/big I needed the padding.
In this picture I only cut off about an inch, but I actually ended up cutting off about 2 inches instead.
So my piece of foam was now 10" x 12"

I folded the foam in half (hot-dog style...does anyone even say that anymore...?) and made two marks with a marker.
I then used my hot glue gun on one side and folded the foam so it was glued together.

See, nice and thick to protect my arms :)

The fabric was the perfect size so I spread it out and found the middle.

I then folded it over, lengthwise, right sides together and pinned the raw edge.

I sewed down the pinned side first with a straight stitch, and then I went back and did a quick zig-zag stitch just to give it extra strength.

Then turn it right-side out, both long sides should be closed, and both short ends should be open.

On one end of the short ends I placed two velcro pieces about 1 1/2" up from the raw edge.

I then sewed the velcro pieces in place.
I didn't sew the velcro through both layers of fabric though, just through one.

I then turned the whole thing inside out again and folded the raw edge up about 1/2" and pinned it.

I just sewed a straight line across the bottom to close it up.

Turn the whole thing right side out and it should look like a mini pillow case.
I then stuffed my foam into the 'pillow case'

You won't push the foam all the way to the bottom, you'll have about 1" of empty space there.
See picture below.

So this next part is where I was doing a little more experimenting.
I folded the top raw edge in about a 1/4" and pinned it to hold it in place.
You can actually just sew a straight line here to close it off, but for some reason I didn't yet...
If you choose to sew the straight line right now to close off the top, then for the next step, when you are sewing in the velcro, you will have to sew the velcro pieces through both layers of fabric and you will see the stitching.
If you want to attach the velcro before you close up this part and not see any stitching, then place the pieces of velcro where you want them, sew them in place, and then sew a straight line across the top to close it.
(Does this all make sense??)

I, however, did it this way.
I placed the two opposite pieces of velcro where they will line up with the other side when the cushion is folded over
I placed the two opposite pieces of velcro where they will line up with the other side when the cushion is folded over

And sewed them in place, sewing through both layers of fabric.

I then removed my pins since the velcro was sewn through both layers and holding the fabric together.

I realized that I didn't love the look of the stitching from the velcro, I guess using a different color of thread would have been helpful, but anayways...

I decided to cover it up with ribbon!
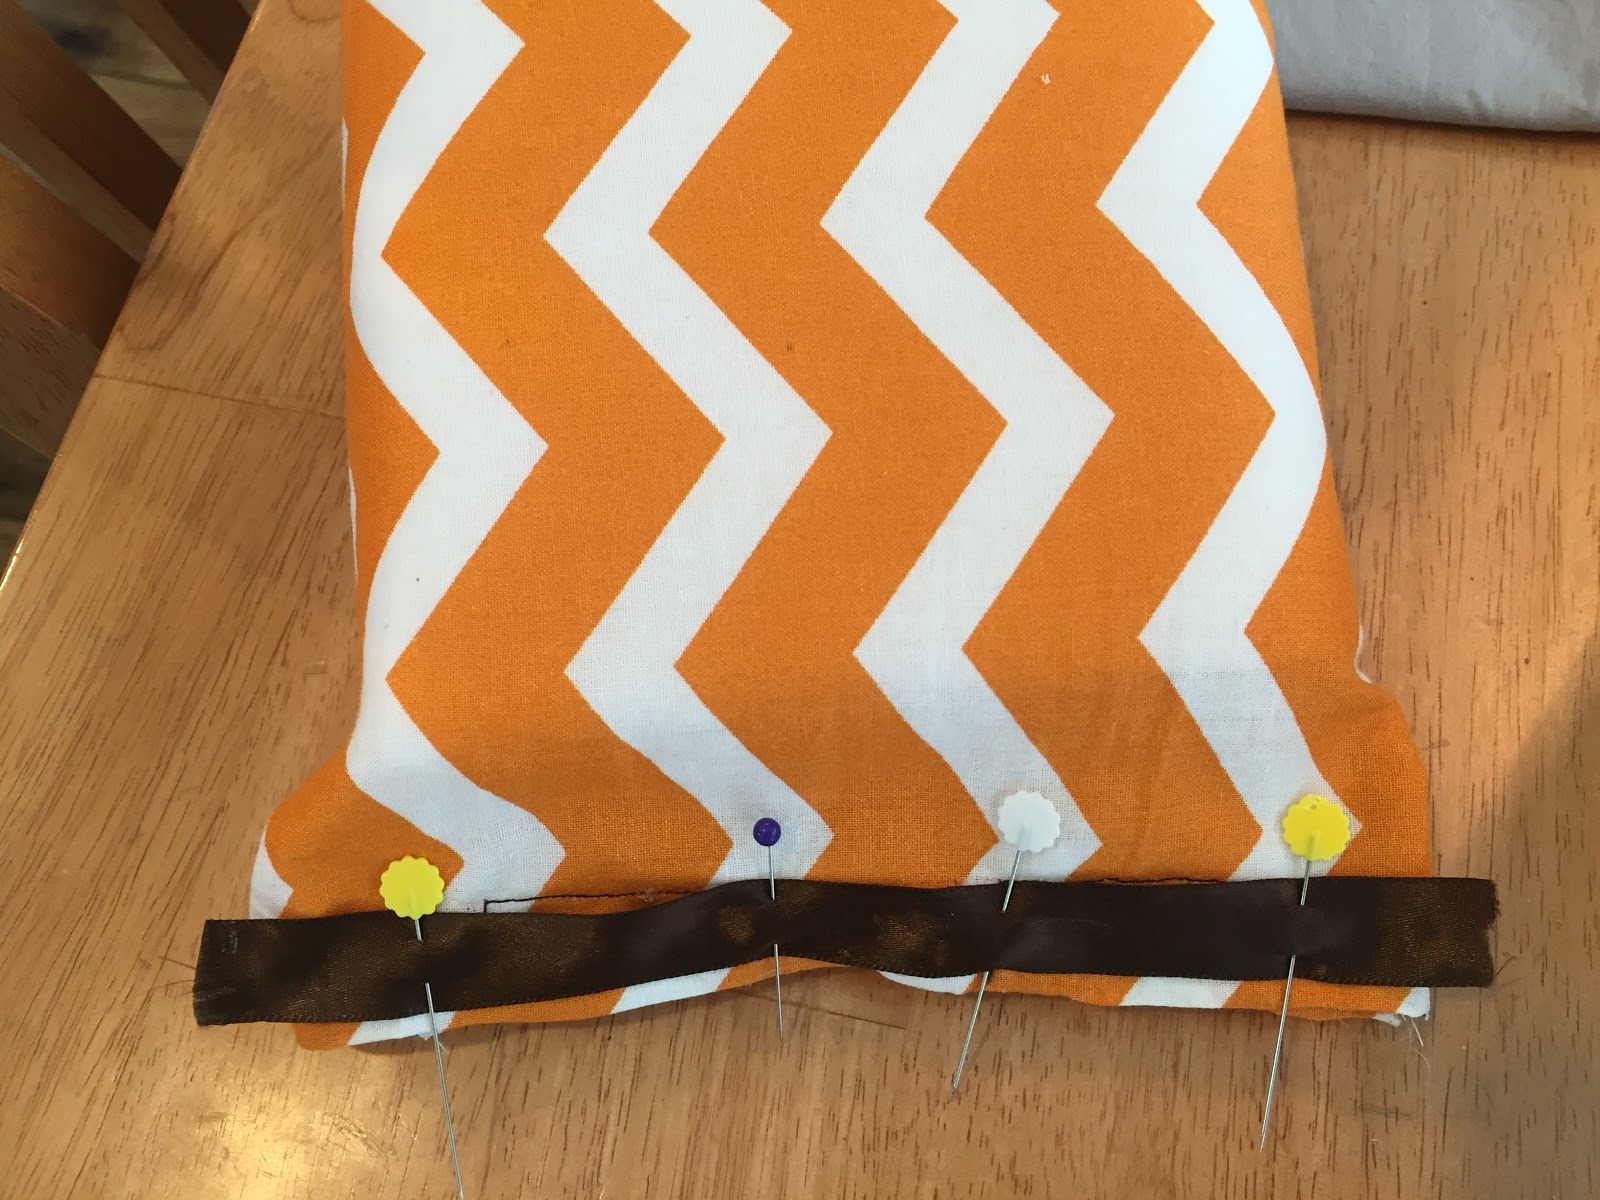
I sewed the ribbon in place, which ended up closing up the fabric all the way across.

See? Our foam piece is now fully enclosed.

I folded the ribbon over the side and took my hot glue gun and glued it down to finish off the raw edges.

I then ran over to the car seat and attached the arm cushion to see how it looked, and I loved it!
I actually like the ribbon across the front, it matches the brown in his car seat and kind of gives it a more finished look.

My arms are going to be so happy when this little guy decides to make his apperance :)

I hope that tutorial was helpful and explained well enough for you to understand!
If you have any questions, please feel free to ask.
It proved to be Very helpful to me and I am sure to all the commentators here! Elia & Ponto
ReplyDeleteFantastic Post! Lot of information is helpful in some or the other way. Keep updating.breathable chair cushion
ReplyDelete
ReplyDeleteI really appreciate the content, thank you for sharing such a nice content with us.
Boat covers in Oshawa Ontario
Car carpet in Oshawa Ontario